All UMD students, faculty, and staff may download a "Take Home" version of Read&Write (R&W) for their personal computers.
Note: If you do not have a @d.umn.edu email address, please email [email protected] before downloading, so you can be authorized to use R&W.
1. Download the software.
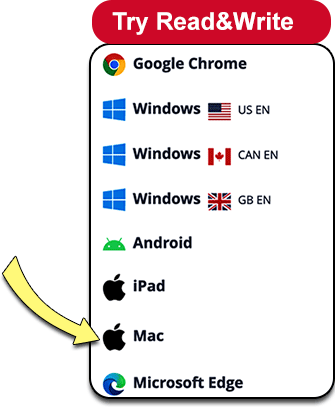
Go to the texthelp website. Select "Try Read&Write". Then choose Mac from the dropdown menu.
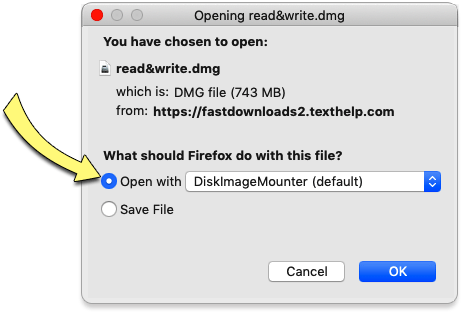
A dialog box titled "Opening read&write.dmg" will appear. (DMG stands for Disk Image. It is a format commonly used to distribute files and applications among Apple computers.
Select the "Open with DiskMounter (Default)" option.
2. Install the software.
Drag or copy the Read&Write "rw" icon to your Applications folder.
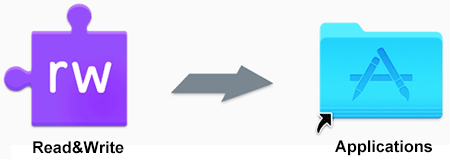
A "Copying Read&Write to Applications" status bar will appear.

3. Open the software and set permissions.
Once the folder has been copied, click or select "Read&Write"icon to start the application.
A succession of dialog boxes will appear.
1st Dialog Box
The 1st dialog box will read "'Read&Write' is an app downloaded from the Internet. Are you sure you want to open it?" Select the "Open" button.

2nd Dialog Box
The 2nd dialog box titled "Read&Write requires Assistive Devices to be enabled for some features" will appear and ask you to "Complete the following instructions 1.) Click Security & Privacy button below. 2) On the Security & Privacy preferences screen that just opened, click the lock icon and enter your password when prompted. 3). Tick the box beside Read&Write icon as shown below, then click continue to open read&write."
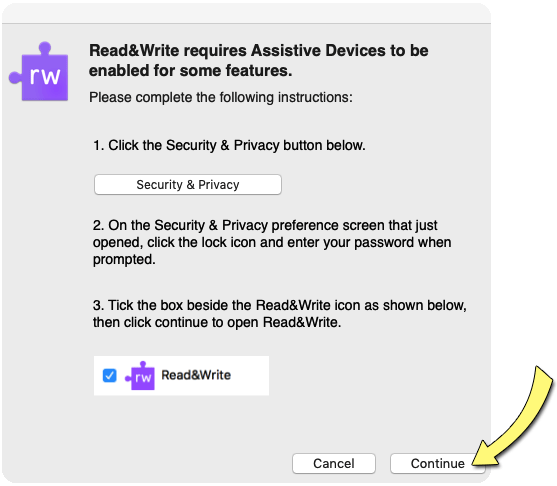
Complete all 3 items in the 2nd dialog box and select continue.
3rd Dialog Box
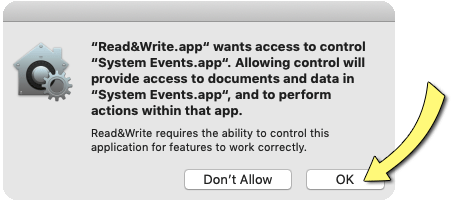
A 3rd dialog box will appear and read ""Read&Write.app' wants access to control 'System Events app. Allowing control will provide access to documents and data in "System Events.app', and to perform actions within that app. Read&Write requires the ability to control this application for features to work correctly."
Select the "OK" button.
4th Dialog Box
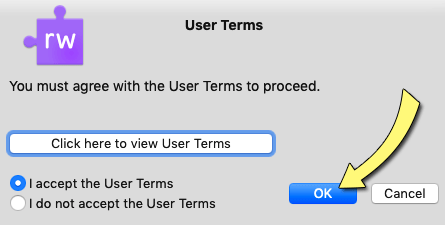
A 4th dialog box titled, "User Terms" will appear. It will read, "You must agree with the User Terms to proceed." You can read the terms by selecting the "Click here to view User Terms" button.
Select "I accept the User Terms" and "OK".
4. Sign in
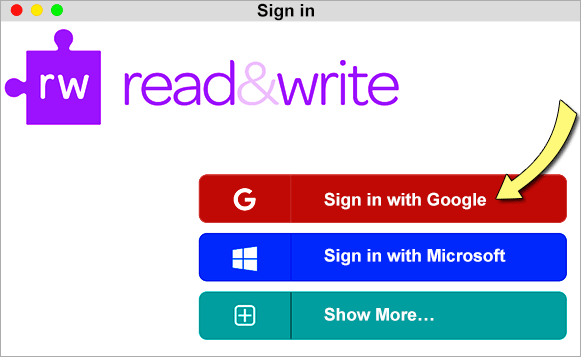
A Read&Write sign in dialog box will appear. Select "Sign in with Google". Enter your d.umn.edu email address to authenticate. If you do not have an @d.umn.edu email address, please refer to the previous note.
5. The Read&Write toolbar should appear.

If it doesn't appear or you need help, call or stop by the ITSS TechCenter HelpDesk (218-726-8847, Kirby Plaza 165).
6. Enjoy using Read&Write!
For a tour of the toolbar watch the Mac Toolbar Video.